Category Archives: Tech Tips

#TMC16 Twitter Session: Dot Replies, Convos, and Diving In

Posted on by 0 comment

At TMC16, while walking back from lunch with Hannah (@girl_got_range) and Tom (@trigoTOMetry), someone brought up the fact that even though we are at Twitter Math Camp, we still need some help navigating Twitter. After a few tweets, Glenn (@gwaddellnvhs) and Justin (@JustinAion) graciously offered to host a flex session on it Monday afternoon. I attempted doing sketch notes during the presentation, then attempted again when I got home, but, er….well, I’m just a digital gal, I guess!  So here are some of the major things we learned:

First and foremost, WTF is a dot reply?
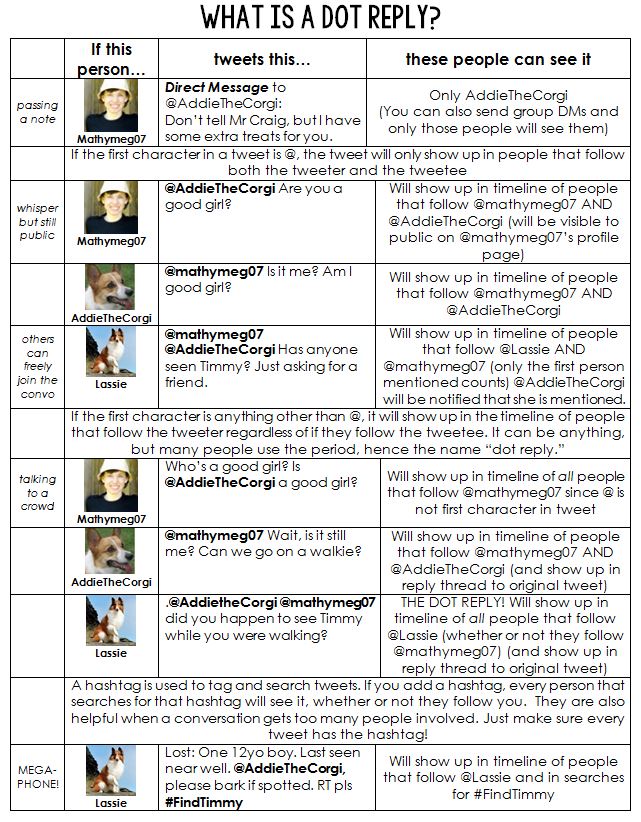
WTFDotReply

Here is the word doc if you’d like to modify it or share it. 🙂

After four different attempts at trying to create something pretty, it’s just going to be easier to blog about following Twitter conversations–something with which I always struggle! I always have FOMO (fear of missing out) on part of the conversation!

Justin came up with the clearest way of describing a Twitter convo: imagine the original tweet is the trunk of a tree, and reply thread is a branch. If you are a leaf on the branch, you can only see that branch. BUT if you are at the trunk, you can see the whole tree.

For example, let’s say I see a tweet in my timeline from @AddieTheCorgi; I see it’s a reply, so I click on it and get this:

Capture

I’m only seeing the branch that @AddieTheCorgi’s leaf is on. BUT if I click the “trunk” of the tree (the first tweet at the top), I can see the WHOLE TREE!

Capture1

As long as you click “reply” (and not start a new tweet thread), a dot reply will still be threaded as shown above. Here is more of the tree:
Capture2

Well, almost the whole tree. Sometimes they sneak “view other replies” in there, so clicking on that will zoom into that branch:

Capture3

Also, see that hint from Megan right above? That does work, but only when replying to yourself. And turns out there’s also this issue with replying to yourself and taking out the mention:

Capture5

So certainly reply to your own “trunk” if you have more than 140 characters, but let people know it’s a continuation!

Just like it’s ok to jump into a conversation whenever you want, it’s ok to ask to be removed from a conversation as well. A “Please remove my mention, I don’t need to be in this thread anymore” should work (unless some people reply before they see your tweet, but it should get to it to stop shortly). It’s also ok (and appreciated) to reply to just one person if it only involves them, even if that person isn’t the original tweeter. I know I get lazy sometimes and just hit reply and start typing, but it would be beneficial if we all took a second to (a) click on the original tweet to see if someone already replied your exact thoughts (guilty as charged!!) and (b) @mentioned and #hashtagged with intention. It’s not cool to slap a popular hashtag (or person) onto an unrelated tweet just to try to gain audience. It IS cool to @mention someone when you’re sharing something they did or helped with.

Also worth mentioning is when the mentions in a thread start getting unwieldy: start a hashtag!

And just because I wanted to prove to myself I could make one, here is a “5 Top Tips for Twitter” infographic (made using Canva):
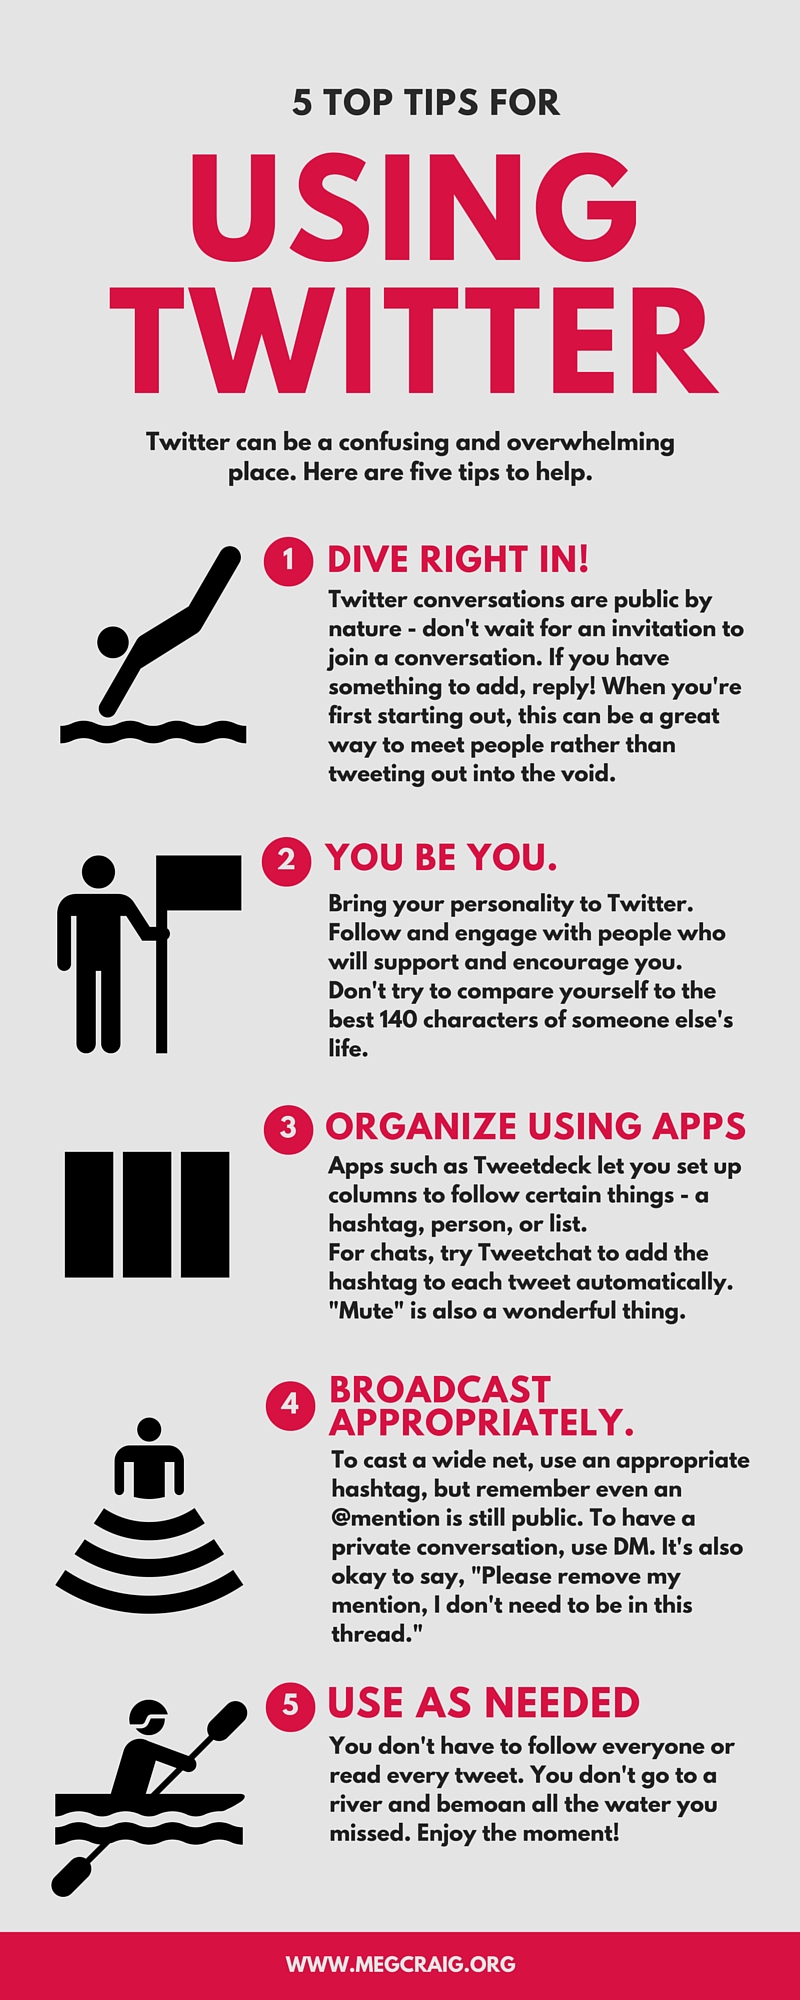
5 Top Tips for Twitter

For further reading, I recommend Hannah’s comprehensive gdoc of our flex session and also Michael Fenton’s (@mjfentonpost with great tips (where I first learned WTF a dot reply was).

And if you’re not on twitter yet, please join! Or if you are on Twitter but don’t feel a “part” of it yet, just like in real life, it takes time to build friendships and followers. Join in a chat, reply to a conversation, ask someone a question about their latest blog post. We need your voice in the #MTBoS!
#MTBOS My Favorite: Graphfree

HUGE HUGE HUGE hat tip to @jreulbach and @MrsDavisAlg2 for introducing me to My Favorite. If you make any of your own worksheets, tests, or warmups and if those include graphs, this is going to be YOUR favorite favorite as well (I guess you could check out the other favorites from the ExploreMTBoS blogging initiative, but I’ll know that this one is secretly still your favorite)

Let me preface by saying that I love Desmos. I love introducing teachers and students to it for the first time. So intuitive and the graphs are so pretty…until you try to put them in Word. Then the graph is too big or the font is too small and you can’t label and the grid lines aren’t where you want them and you can’t see the gridlines when you copy on the copier and yes, there are some workarounds and hacks but at 8:30 the night before I’m giving a test I just want to painlessly insert a readable graph. I actually got pretty good at using wordart to graph stuff (please don’t even mention the horrible graphs that come out of the Microsoft Math add-on), but still, it was time-consuming and not perfect.

Enter: graphfree.com

(If I was one of those annoying websites with sound, I’d have a chorus of angels singing right now)

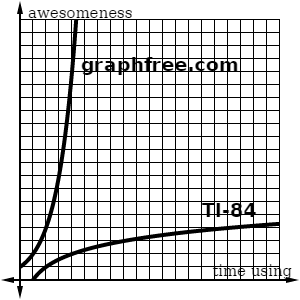
This is EXACTLY what I needed. graphfree2

The above graph took me a minute, maybe two at the most. The program is fairly intuitive (there’s also a great user guide and videos), so I’m just going to point out some things you may not notice at first glance.

Hint: To make labels, under the calculator, there are three tabs. Choose “set custom note texts” and type your labels. Once you “Create Plot” you can drag the labels around the graph. Note: The location resets every time you “Create Plot” so wait until you have your final version of your graph before you drag them around.

Hint: (I just found this one out this week!) You can make a custom quickset with all of your settings. Look at the very bottom (below the three tabs below the calculator), you’ll see “apply custom quickset” and “create custom quickset.” I like -8 to 8 on my axes with black gridlines, so I set that as quickset. Now I just click that when I open the page and it’s magic!

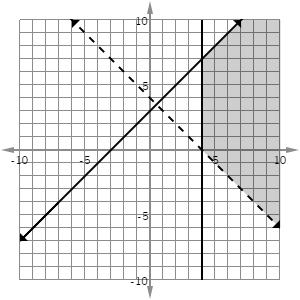
Did you say you wanted to make some inequalities?

graphfree1

Hint: Again, below the calculator, there is a tab for “set shading options” Here you can tell it shade above/below any of your functions, and also shade right/left/above/below vertical or horizontal lines. Note: it does not graph the actual line for the right/left/above/below shading. I added the vertical line by choosing the “implicit” plot type and entering x = 4. Alternatively, there is an “asymptote” plot type that will give you a dashed line.

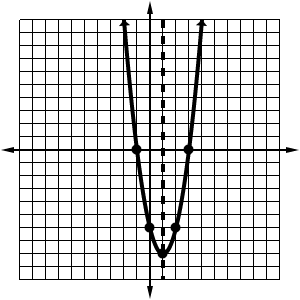
The asymptote is what I used for the axis of symmetry:
graphfree6Hint: Use the scatterplot type to add specific points to the graph.
There’s also polar:

graphfree3

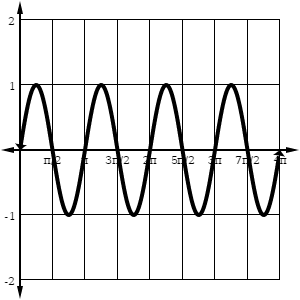
And Cartesian in radians in terms of pi!  (this option is found under “Grid Type”)

graphfree9

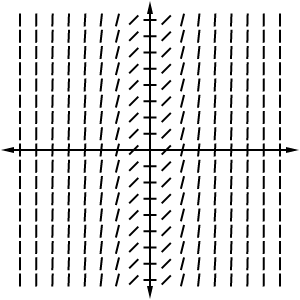
And slope fields for you Calculus folks (under “plot type”):

graphfree7

And even number lines! (Hint: make sure both the plot type and the grid type is set to Number Line)

graphfree8

The only thing that’s a little tricky is getting it into your Word document. You can either use the snipping tool OR right click, copy image, then in Word select “paste special” then “device independent bitmap”. I like to set the pixel image size to about 200 x 200; I usually don’t have to resize it once I paste it. For more details about how to insert the image, see the user guide here.

Seriously, spend 10 minutes reading the user guide and watching the videos and you will be a Graphfree expert.

Bonus hint: you can also not plot any function to make a blank coordinate grid for worksheets and tests!

I told you it was going to be your FAVORITE favorite!!!!


Twenty Day Digital Organization Challenge

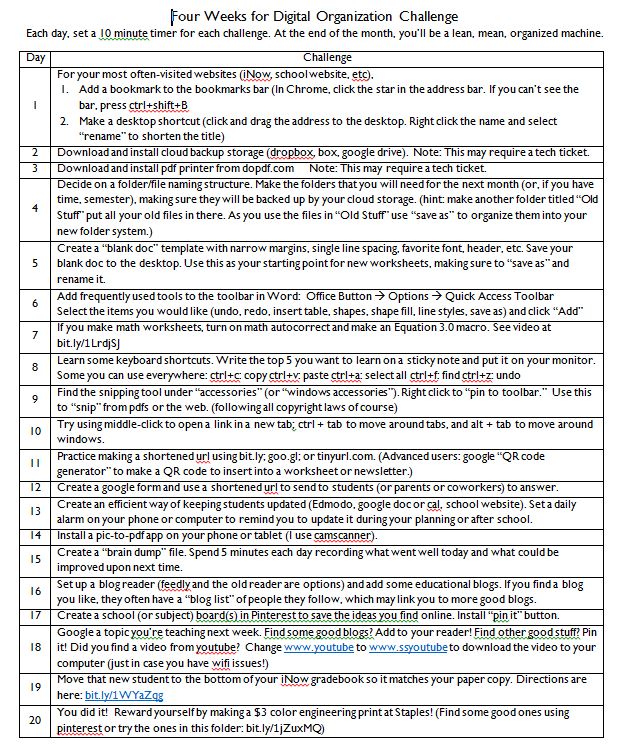
I was asked to give some professional development about tech to a local teacher group. I was told that the teachers there probably weren’t the tech-i-est so I started listing things I wanted to show them. Then I thought, well, if they’re anything like me, they are going to file this paper away and then never try anything so because they don’t have time. So I made it into a ten-minute-a-day challenge. I mean, we can all find an extra ten minutes, right? I came up with 20 so it would be a month’s worth of school days. I’m sure most of you are pretty tech savvy, but maybe there’s something new for you (or you can hand it out to your other non-tech-savvy friends). Here’s the challenges:

Twenty Day Digital ChallengeFile here

And I copied these shortcuts to the back:

Word and Equation ShortcutsFile here (whoa, I just noticed that half of the equation stuff is for the new (gross) editor! Will try to fix it ASAP!)

If you’d like to know more about equation editor and math autocorrect, visit this post.

I also asked about some good tech tips on Twitter and I got a ton of great responses! Some totally new to me, some old favorites, and a lot of apps/add-on suggestions!  Check out the tweet and replies here!  Thanks to everyone who made some great suggestions!

Category: Tech Tips | Tags:

Little Miss Organized

I know, I know, if you saw my desk photos on twitter, you would think I meant “disorganized” but I really try to have my act together. Here are two things that are helping me this year that I thought I would share so those Type A types would stop giving me that disapproving bunny look.

One thing is this year my schedule does not have all my preps grouped together.  No, this is not the first year that that has happened, but it’s the first time I’ve found something that has kept my sanity: 2 clipboards. I have one for each prep. My notes for the day, homework from last night, bellringers for the week, seating charts, etc go in the clipboard. At the end of the week, I go through it and file the stuff away for each class (I keep a hard copy of my filled in notes). This really helps when I haven’t finished the notes from one day so I need to keep those handy for tomorrow, or if I have one homework worksheet I’l be using all week. It would be even awesomer if I had different colored clipboards for each class, but these were free from another teacher and I’ll always take free over cute.  Well, not always. I mean, just ask Addison.

The second thing is that I have always been pretty good about keep a blog updated daily for my students (now, training them to use it when they are absent is a whole different manner).  After going through 4 different “blog” platforms in the last four years, each with its own pros and cons (like an Amazing Race detour!), I have found what works the best for me: a google doc. WHAT? I know. Welcome to the ’90s, Mr Bah-nks. (Kudos to the three of you who got the Father of the Bride reference.) Here’s what a typical week looks like:

PC Google Doc

I just put a view-only link on my school site and now I can update the file daily (I set a reminder to pop up at the start of my prep period to remind me to update it) with links to filled-in notes, homework, updated schedule because no one told me that we’d miss an entire class period to talk about ordering school rings, etc. (note: I think in the 6 or 7 years I’ve been posting a blog I may have gotten 4 comments from students, so that was not something that I was looking for).  Bonus: at the end of the year, I’ll have something I can print out and refer to when planning next year (question: if I add comments, can the students see it?  I would love to be able to add reflections to it. Or can I make another google doc that syncs to this one so I could add my reflections to that?).

Double bonus: I can also share them with my faithful and loving blog readers, in case they are up nights wondering what I did in class last week (or, you know, if they want to use some notetakermakers or homework or such which may be the more likely scenario). Here is Algebra II w/ Trig and here is PreAP Precal.

And just in case you’re still not sold on the idea that I am actually organized, I’ve been asked to give a presentation on being digitally organized/time-saving tech tips. I’m thinking snipping tool, blog readers, dropbox (seriously), saving a blank starter doc, dragging a web address to the toolbar, middle-clicking a link. If you have any great tips, share them in the comments or on twitter! 🙂

Category: Tech Tips | Tags: ,

Haaaaave You Met Desmos?

So the first day back from summer, I asked my department if they would be interested in a Desmos workshop. At least two people asked, “What is Desmos?”

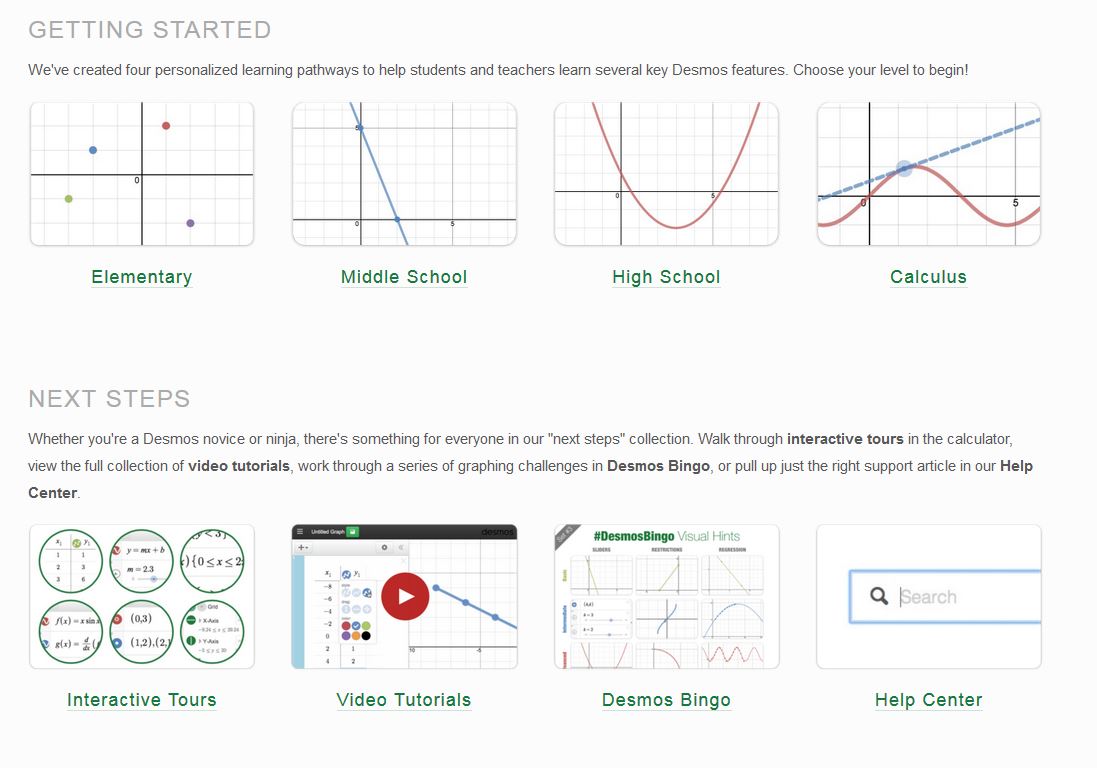
Obviously I had to remedy this situation as soon as possible (or six weeks later). I asked Michael (@mjfenton) for his bingo card from TMC15 and he replied with some new desmos awesomeness: go check out learn.desmos.com:

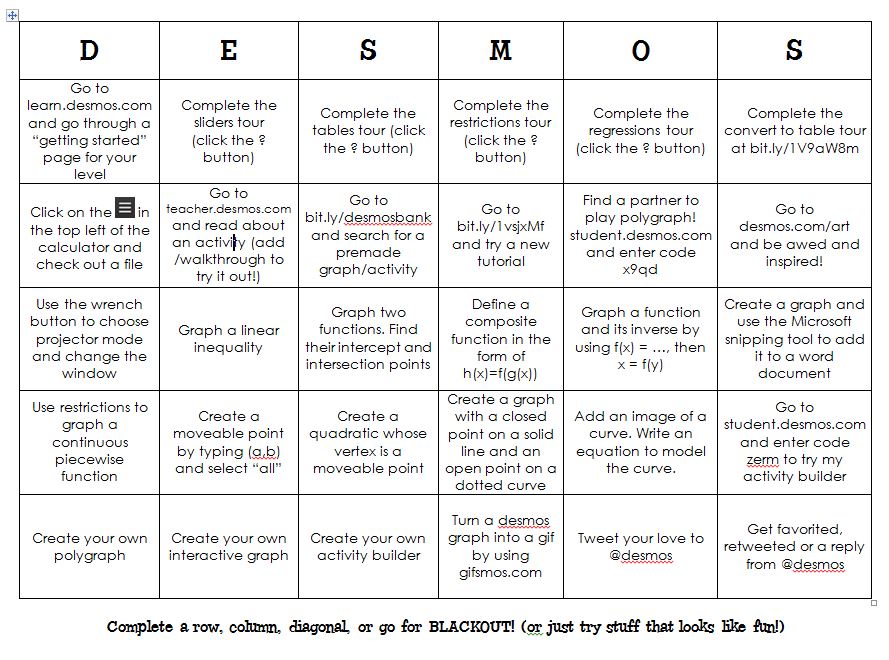
learn desmosBut it turns out that I have this issue that I can’t just use what someone else has made. Why? I don’t know. Maybe I secretly feel like it’s cheating? I told myself this wasn’t *exactly* what I was aiming for in my session, so I made my own bingo card, borrowing quite a bit from the TMC version (because “borrowing” isn’t cheating?. I can’t explain):

desmos bingo(file here)

Only a few people were able to show up due to conflicts, but we had a really fun time!  I started them with this activity builder so I could have it running and show them the teacher dashboard on the projector. Then I let them loose on the bingo card. We got through the first three rows in about an hour (and the time seemed to just fly by!). We also did lots of brainstorming and bouncing off ideas to use in class. There was of course lots of “where was this last week/last year/when I was in college!?!?” comments. 🙂  Oh, and is there anything better than that gasp when someone uses a slider for the first time?

Now I just need to figure out how I can get a job going around to schools and playing desmos bingo with teachers. Basically, I want to be Barney and replace “Ted” with “Desmos”:

But that would be weird if I randomly started emailing schools and offering free desmos bingo, right? Yeah, I’m pretty sure that would be weird. 🙂

Category: Tech Tips | Tags: ,

My Three Favorite Word Shortcuts for Math Teachers

I’ve shared these before, but not all in one handy video and not with SOUND before. It’s like I’m right there in your living room room controlling your every move on the computer. But like in a not-creepy way.

In other news, it seems I really like the word “WHAT?” especially when paired with “that just happened.”

I will certainly take requests for the next installment. Is there something you’d like to know how to do in Word? Make tables? Make drawings? Make shortcuts for pi/2 or square root of 2 over 2? Put in graphs? Or maybe you’d like to make a fancy powerpoint with equations and such? Leave me a comment or tweet a request!

Category: Tech Tips | Tags:

Graph(s) Paper

So the Kickstarter for CoordiMate was discussed in the MTBoS recently.  It’s a self-inking stamp of a coordinate grid aaaaand I kind of want one.  Because I am the laziest/non-scaliest grapher in the world. “No, trust me kids, this would look like a line if I had the ability to space my tick marks.”

But until then, at least I have really pretty graphs I can print out and/or cut and paste into worksheets, tests, etc.  And now you can too!  Let’s check out the rewards for my own personal mathstarter campaign:

Pledge at least $0

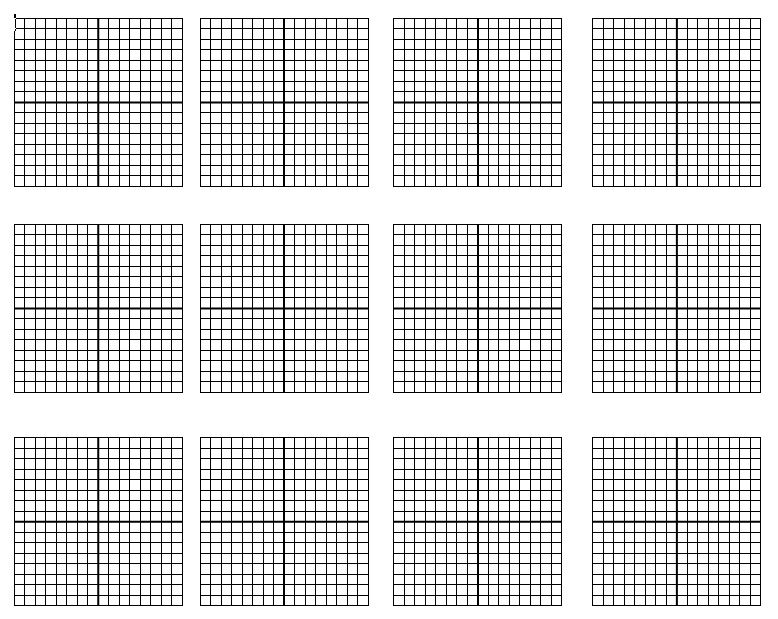
Get a full page of -8 to 8 graphs that you or students can print out for homework and practice.

page of graphs  Claim your reward here in doc or pdf!

Pledge at least $00

Get a whole page of -10 to 10/ -11 to 11 blank dotted graphs. My preferred graph for conics.

blank dotted graphsClaim your reward here in doc or pdf!

Pledge at least $000

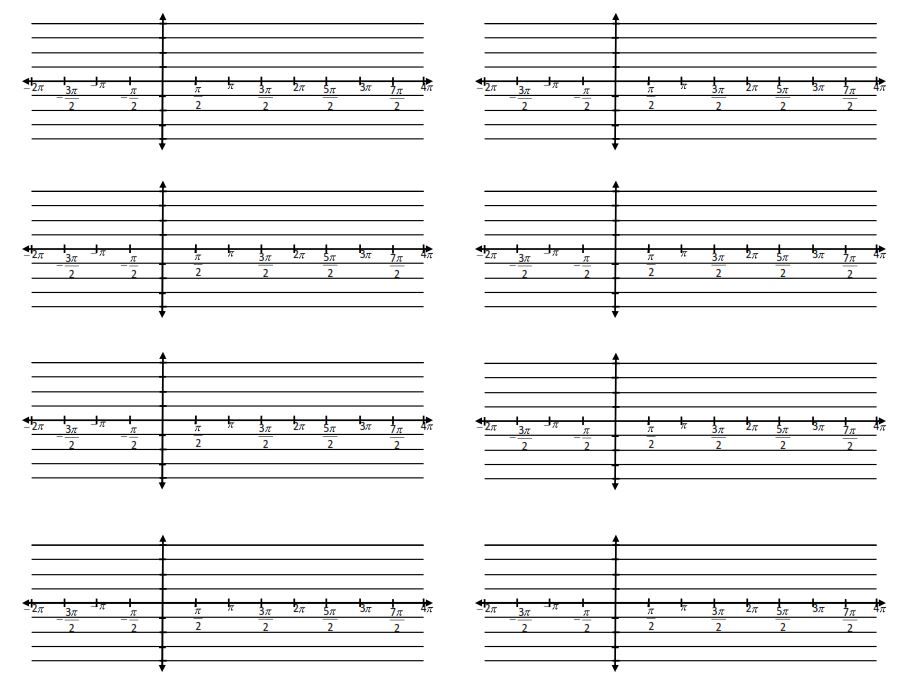
You want trig graphs?  Do ya, punk?  Ok then, here’s a page of blank trig graphs from -2pi to 4pi.

blank trig graphsCurrently available as PDF only.

Pledge at least $000000

For the ultra backers at this level, we have the ultimate rewards package.  This collection of ten different graphs comes as a one-page download so you can quickly copy and paste single graphs into your document.  All of them are made of grouped drawing objects which means you can modify the size but keep the proportions by dragging the corner handle while holding done the ctrl key (but if you’re an ultrabacker, I’m sure you already knew that trick).

variety graphsClaim your reward here as a doc file!

So there’s my mathstarter project. I think it’s next Exploding Kittens, don’t you?

3 Tech Tips for Teachers

Just a quick post to share some of my favorite tech tips.  These are some that I think everyone is born knowing and then I’m shocked to find someone techier/younger/hipper who doesn’t know it.

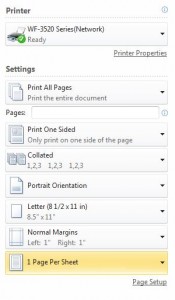
1. Print 2 to a page.

Seriously, these kids have good vision.  Save a tree.  In Word 2010 or higher, it’s the bottom option:

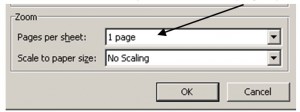
CaptureaAnd in earlier versions, it’s in the lower right of the print box:

Captureb

(I don’t know why I didn’t set my examples to actually have “2 pages” instead of one, but I trust you guys are smart enough to figure that part out.)

Pro tip: Type your original on legal.  When you print 2 to a page, it will use up all that space you get at the bottom when printing letter 2/page.

2. DoPDF PDF Converter.

Download here.  (Looks like Windows only, sorry losers Mac users)

This installs another printer on your machine, but it really prints it to a PDF file.  Simply print, select it as your printer, then choose where to save it (you can even choose a default folder).  “But I can save .docx as a .pdf, so why would I need this?”

A) Combine with tip #1.  Type your document as normal (because using Word’s 2 to a page layout while making a worksheet is super annoying), maybe using a slightly larger font (maybe 14, but I can get away with 11).  Choose doPDF as your printer and choose 2 copies.  Then it opens up the PDF and you can print 2 to a page from there.  This really helps when you use the protip above, because sometimes Word doesn’t play nicely printing legal 2 to a page.

B) Make a PDF of a powerpoint handout to post for your students.  Is there anything more annoying than seeing a kid in the library print out 27 full-page slides?  But since you can’t teach everyone everything, this helps.

C) Print all those annoying “print this confirmation” pages (even though I’m about to get 12 different emails confirming that I did, in fact, order Orphan Black Season 2 because I can’t wait for it to come on Amazon Instant Prime).  Send them all to a “receipt” file.  Bonus if you can spell “receipt” right on the first try.

3. En Dash Shortcut

You know how sometimes Word will change your hyphen to a nice wider subtraction sign (the “en dash”), but sometimes it won’t depending on the relative humidity?  I can’t believe that in my previous shortcut post, I forgot to share my favorite shortcut off all: making two hyphens into an en dash:

Bonus tip:

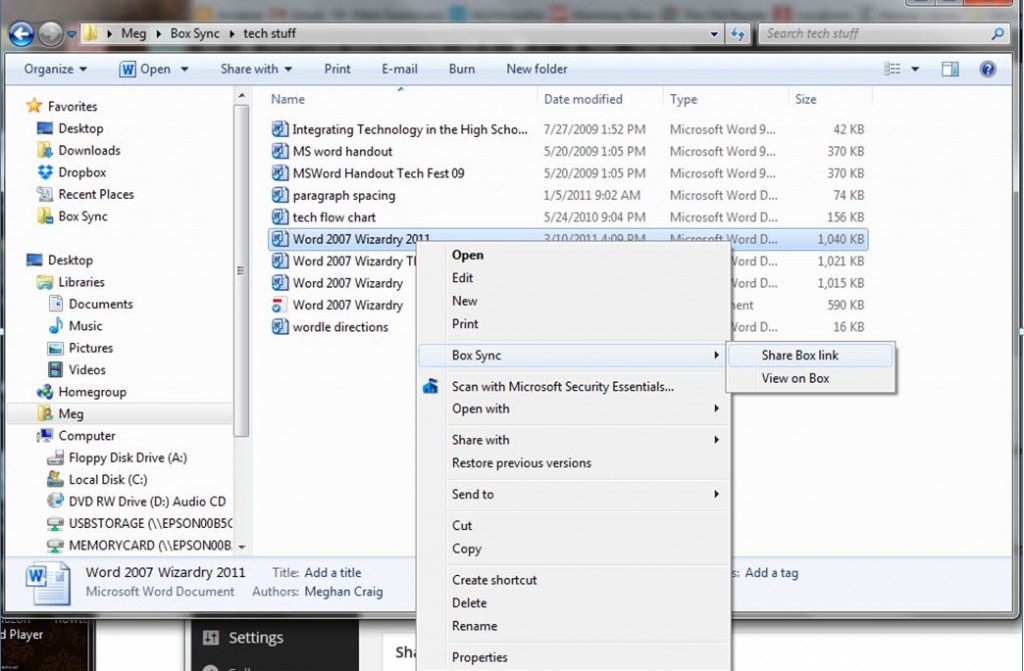
Dude, I just learned this one last month and I’ve been a dropbox user forever. I would always go to the website to get a link to share, but did you know that with box or dropbox, you can right-click on the file or folder on your desktop to get the link?  It’ll copy it straight to your clipboard.
Capture4

Am I seriously the last one to learn about this?

Category: Tech Tips | Tags: , ,

Equation Editor Awesomeness

First of all, thanks to everyone who wrote a comment or tweeted a reply about my first post. I’m still amazed at how many awesome people were at TMC that I didn’t get to connect with, how darn inclusive and supportive everyone in the MTBoS is,  and how quickly MTBoS can take over your entire day.  So I’m going to post this and then stay off the interwebs until Global Math Department tonight so I can fully enjoy one of my last days of vacation and read an actual book!  Anyway, onto the show…

For those of you that thought my Equation Editor “My Favorites” was just a bit too fast, here is a recap.  I’ll also be talking about it and doing a quick demo on Global Math Department tonight as part of the TMC14 recap–please join us! It’ll be my first time non-lurking.

I offered up an Equation Editor flex session or My Favorites before TMC, but wasn’t sure how many people would benefit, so then I un-offered. I thought maybe everyone else didn’t even use worksheets or maybe they are all latex-y or maybe they are so awesome that they can just think about an equation and it automatically appears on the screen.  And then in the middle of Steve’s teacher-life-changing powerpoint, there it was: a square root with no hat.  I thought, “Well, if this guy who is AMAZING and has been dealing with math FOREVER can’t make a hat, maybe there is someone else that needs Equation Editor help, too.”  So I re-volunteered and I hope I helped some of you out!  Here is a recap:

Rule number 1: The equation button in the ribbon is VERY tempting, like a man with candy in the back of a van. DO NOT GET IN THE VAN.  Good life rule, but in this case it is because: (1) formatting is crap  (2) some things are intuitive, but many are not (3) you can’t copy and edit it in powerpoint (4) it does not play well with printers. If you’ve ever printed a worksheet and just the fraction bars are printed but no numbers, thank the equation button.

That’s actually the only rule.  The rest of the information can be found in this handout.  It has the links to the videos (those are also at the bottom of this post) as well as step-by-step instructions.  It also has this amazing chart that you can print and laminate to keep next to your computer:

Eq Ed shortcuts

Haha, I know it looks like there’s not a space between “and then” but it’s a weird table-formatting-issue, not an equation-editor issue. In normal text it looks like a space!


Really, everything you need is in that handout, so go read it!  Well, I say everything, but there are a few issues with Powerpoint.  I’ll try to make a post about using Equation in Powerpoint soon.

The good news is using Equation in Word is really quick and easy once you make some shortcuts and start working with it.  If you have a question or have any Equation Editor tips I left out, let me know in the comments.  And in case the handout is tl;dr, here are the videos (but really, read the handout!  Don’t you want that chart?!? You want that chart.  Seriously, you did not know ctrl + k, < gave you a ≤, did you?  Plus if you read the handout, you can learn how to get ≤ without using underlining or equation editor!

Videos:

Making a Macro:

Using Equation Editor (I didn’t have time to show this one, but if you make piecewise functions you’ll want to watch until the end!)

Making Equation Editor Autocorrect Shortcuts (the magic one)

Making Symbol Shortcuts

And if you made it all the way to the end, a gold star for you!

Category: Tech Tips | Tags: , ,